3 Easy Steps to Get Rid of Knee Pain with Stairs
In our last blog post, we discussed the common causes of knee pain with walking downhill and downstairs. Now, let’s talk about how you can treat it at home!
Walking downhill and downstairs are activities that naturally result in high amounts of compression through the knee joint. When the quadriceps contract, compression in the knee joint rises. The harder the quadriceps contract, the higher the compression. Believe it or not, when a muscle has to act as the “brake” to slow you down – much like the quadriceps have to do with walking downhill – the muscle has to contract much harder than it would to speed you up. Hence the reason knee pain arises when walking downhill and downstairs more than uphill and upstairs!
The key to treating knee pain while walking downhill or downstairs is to decrease the compression forces through the knee as much as possible.
This can be accomplished in a variety of ways including keeping your quadriceps loose, strengthening your hips so the knee is better supported, and adjusting your movement pattern to lessen pressure on the knees. Give the following treatment strategies a go!
1. Keep your quads loose!
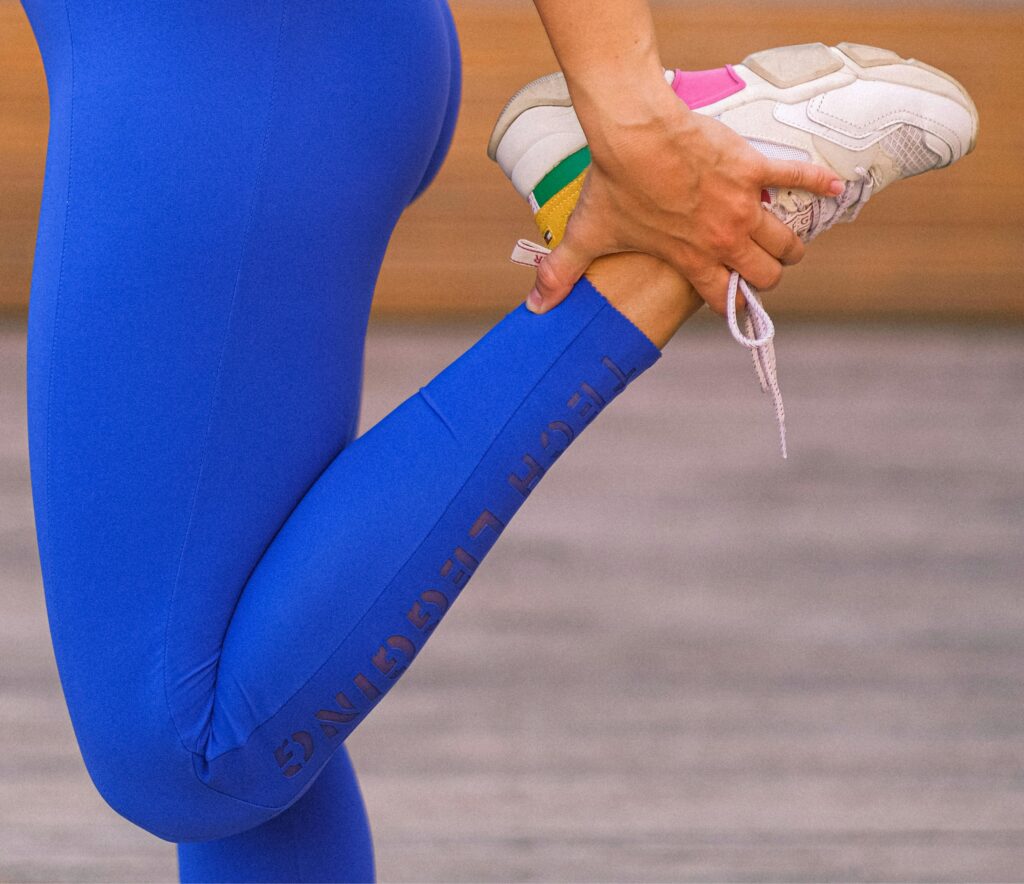
Your quadriceps are a group of 4 muscles that run down the front of the thigh, over the kneecap, and attach via the Patellar Tendon below the kneecap. When the quads are tight, they pull on the kneecap, compressing the knee joint. Keeping your quads loose will therefore offload this compression through the knee and subsequently lessen knee pain! Here are a few exercises to keep your quads loose:
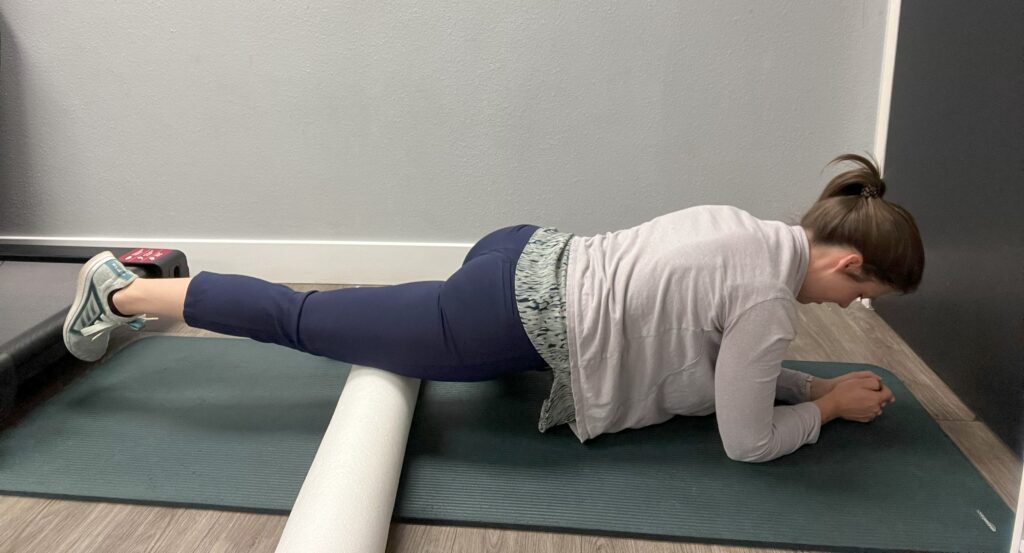
Foam rolling quads
- Lay on your stomach with the front of your thigh on top of a foam roller
- Slowly roll up and down over your thigh, getting all angles
- Once you find a particularly tender spot, pause on that spot and relax your weight into the foam roll for several seconds
- If you can tolerate it, bend and straighten your knee several times while you are applying sustained pressure on the trigger point
Repeat this process up and down your thigh for 3-5 min, twice a day
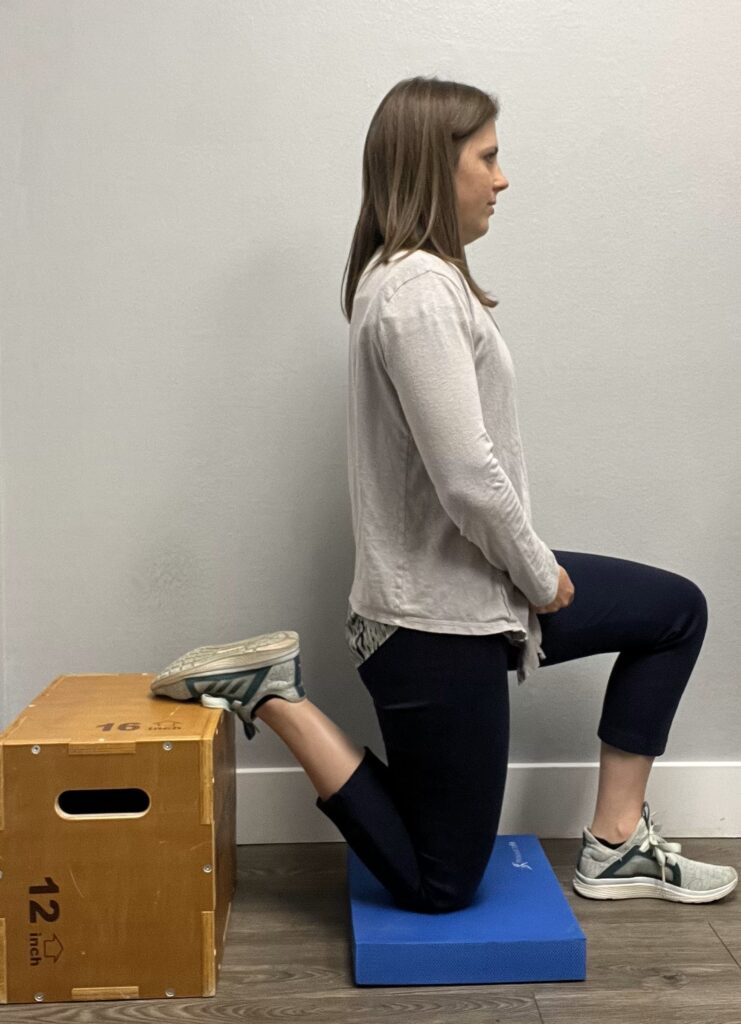
Quad Stretch
- Get down on one knee with your foot on an elevated surface behind you
- Get tall through your torso and lean back until you feel a stretch in your quad
Hold this stretch for 60 sec, twice a day
2. Strengthen your hips!
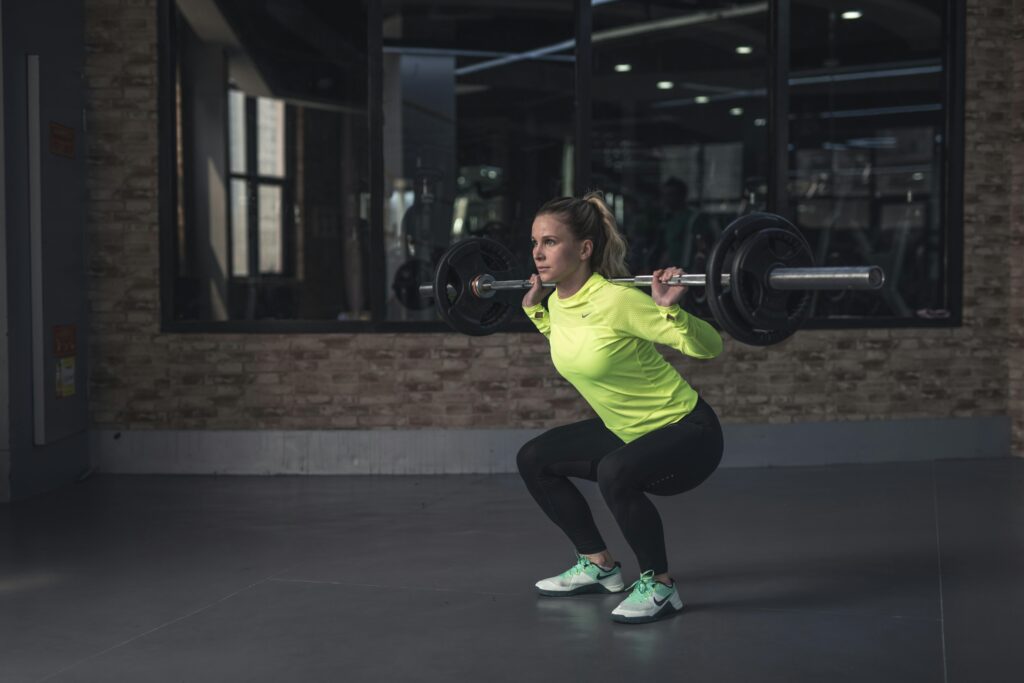
Having strong glutes is essential for knee health. This is because the glutes control the side-to-side position of the knee in weight bearing, which can help ensure the kneecap is sliding up and down properly in its groove. Strong glutes also serve to “spread the load” between the muscles surrounding the knee and the muscles in the hips, which also decreases the stress in the knee. Here are a few exercises to try:
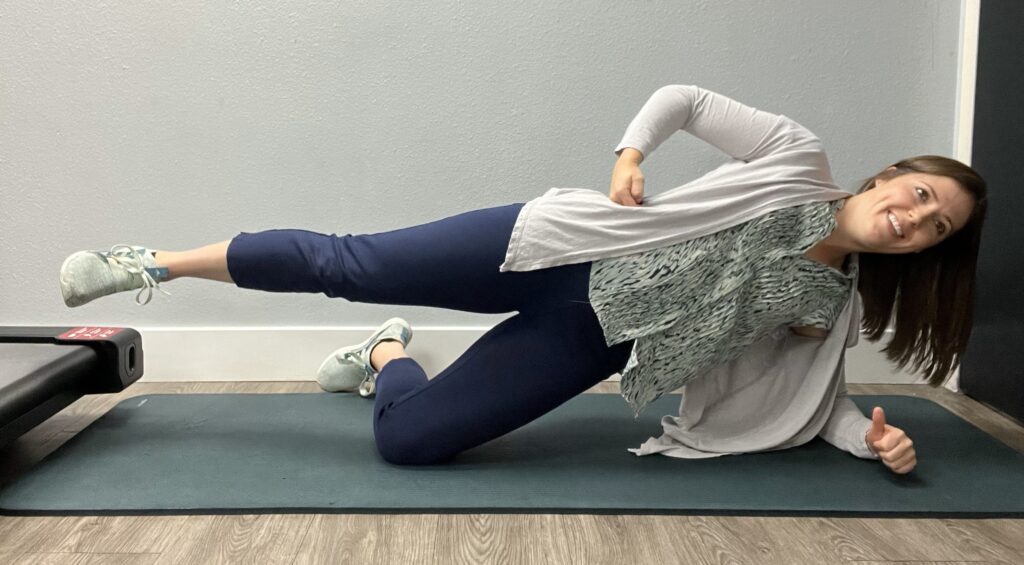
Side Plank with Leg Raise
- Get in a side plank position with the bottom leg bent and the top leg straight
- Your shoulders, hips, and knees should be in line with one another
- Raise your top leg straight up towards the ceiling
- Be sure to keep your top leg in line with the plane of your body (ie. don’t let your leg lift up and forward)
Perform 2-3 sets of 12 reps ea side
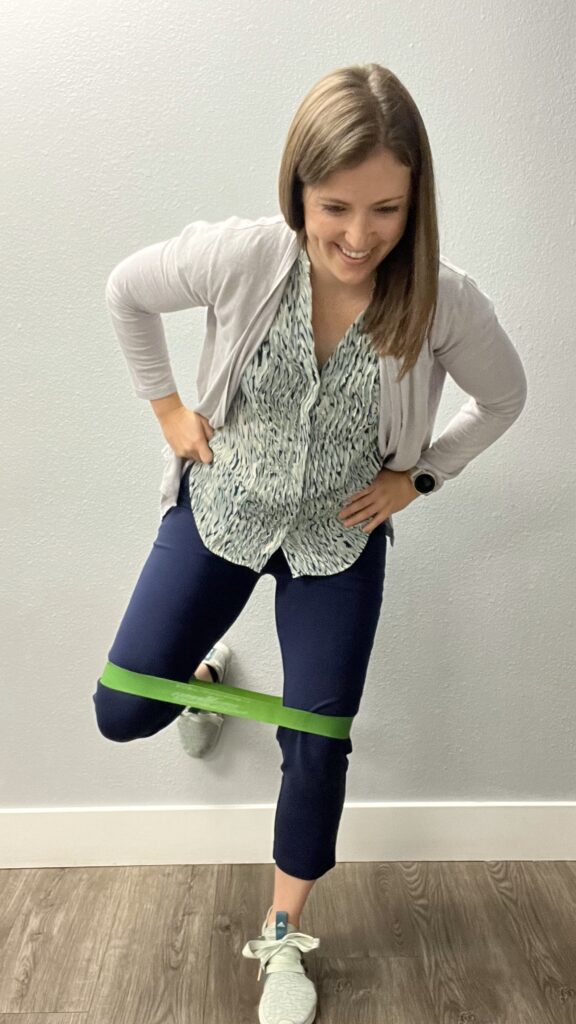
Standing Clamshell
- Put a small loop band around your knees
- Stand on one leg with your opposite foot against a wall behind you
- Start with a very slight bend in your standing leg
- Open your bent knee against the band
- Keep the knee of the standing leg stacked over your toes; don’t allow the stretch of the band to pull your knee in
Perform 2-3 sets of 12 reps ea side
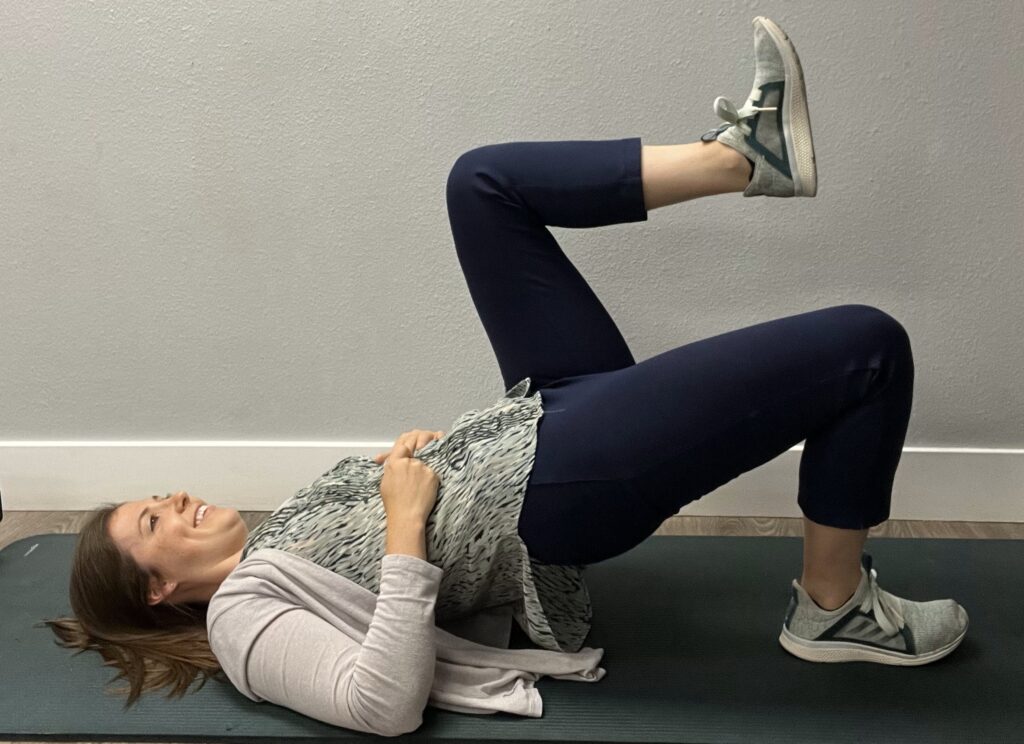
Single Leg Glute Bridge
- Start laying on your back with your knees bent and your feet flat on the ground
- Lift one leg until your kneecap is pointed towards the ceiling; keep this leg off the ground throughout the exercise
- Lift your hips off the ground until your hips are straight
- Maintain level hips as you slowly raise and lower your hips off the ground.
- NOTE: If you are getting cramping in the back of the thigh or if you are unable to keep level hips, do a double leg glute bridge instead!
Perform 2-3 sets of 10 reps ea side
3. Learn How to Properly Hip Hinge!
Hip hinging is an essential movement pattern to learn if your goal is to lessen pressure on your knees. Before we get into the details of hip hinging, let’s first consider a more familiar movement pattern that we can use to compare and contrast: the SQUAT!
In a squat, the knees and hips both bend at equal rates, the hips drop towards the floor, the knees migrate forward with the shins at an angle, and the shins and torso remain parallel with each other. This movement heavily relies on the strength of the quads.
Now, let’s consider the HIP HINGE! In a hip hinge, the knees start with only slight bend, the hips shift back without losing height, the knees stay where they are with the shins upright, and the torso bends forward with the back flat. This movement utilizes the glutes and hamstrings far more than the quads, which serves to offload compression through the knees.
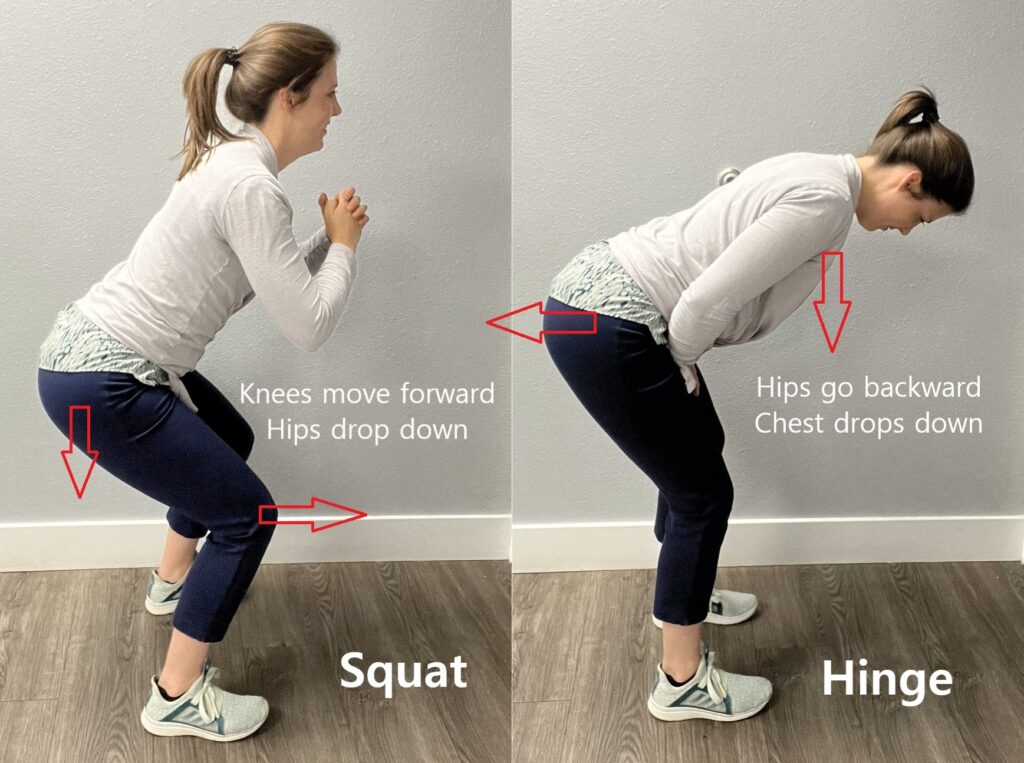
So, with the hip hinge in mind, it is helpful to use more of a hinging pattern when going downhill and downstairs to decrease pressure on the knees. Think about sitting your hips back and leaning your torso slightly forward as you make your way downhill or down stairs. This is in contrast to the typical strategy of keeping your torso upright and allowing your knee to migrate far forward over your toes. Give this a try next time!
Don’t let knee pain hinder your day to day activities! If you are still unsure about how to handle YOUR knee pain, or if you’ve tried these steps without success, Physical Therapy can help. Click below to schedule your FREE phone consultation to determine if physical therapy with Revitalize Athletics is right for you!
Contact Us Today
Not sure where to start?
Schedule your free 15-minute consultation.
Returning client or ready to get started with therapy today? Call us to schedule your appointment.
